Many people are asking about how to set up Facebook instant article with Blogger (blogspot). For WordPress user, there is Instant article plug in which will guide you through step by step for set up. But for Blogspot, it is quite difficult as there is no plug in and there is no formal instructions from Facebook for blogspot user.
I have tried several ways to run instant article on Blogspot, and finally found out the easiest and 100% sure way to get Instant article approval. I have tried this steps for 5 of my blogspot site, all got approval and now I am earning money from Instant article and audience network ads.
(But I am also using WordPress for some of my pages)…. But I prefer to use Blogspot as it allow you to place Ads manually which will increase impression and your revenue. Follow the below step to set up Facebook instant article with blogger.
In order to set up Instant article for Blogger, here is the checklist.
1) Blog created by Blogspot (Blogger)
2) Facebook page (This page should be old enough to show at Instant Article set up page list)
3) Make 10 articles ready to be submitted for review
4) Logo for your Page and Blogspot
Step 1:
Visit this Link:https://instantarticles.fb.com
There, you will see “Sign Up”. If you click “Sign Up”, you will have to choose the page that you would like to link with your blog. According to recent Facebook update, newly created Facebook page will not be shown in the page list. So that your page should be old enough to be listed there.
Step 2: After you choose your page
You have to check to agreed Facebook Instant article term, and then click “Access Facebook Instant article Tool”.
You will be directed to your Facebook page’s publishing tools column. There you will see “Instant Article”
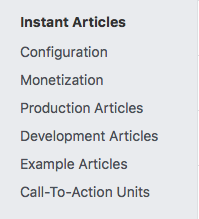
Step 3: Working on Configuration
At Configuration session, you have to work on some tasks.
Click on configuration and then go to Tools:
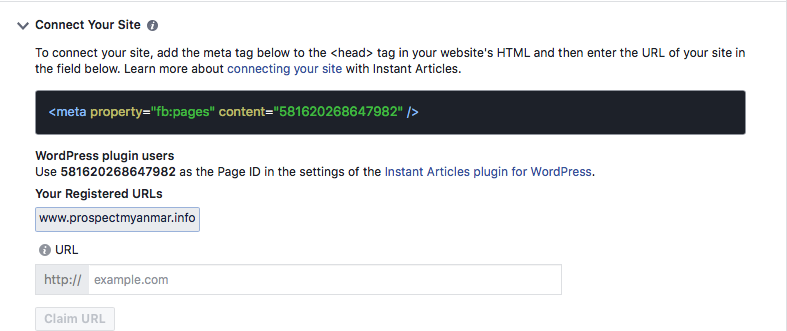
1) Connect your site
Copy the code show in the black box and then place this code into your Blogspot HTML editor. Place this code into <head> </head>.
Then fill your blog spot address in URL box.
Then click Claim URL. (If you place the code correctly in HTML editor, your blogspot will be shown under “Your Registered URL”.
Ok. You have connected your site to Facebook page.
2) Production RSS Feed
Fill the following URL into RSS feed URL:(Don’t forget to replace yourdomain.com with your Blogspot domain)
http://yourdomain.com/feeds/posts/default?alt=rss
Then click Save.
3) Development RSS Feed
Follow the above step in this Development RSS feed. Fill the same URL into Development RSS Feed.
Yay.. You almost finish.
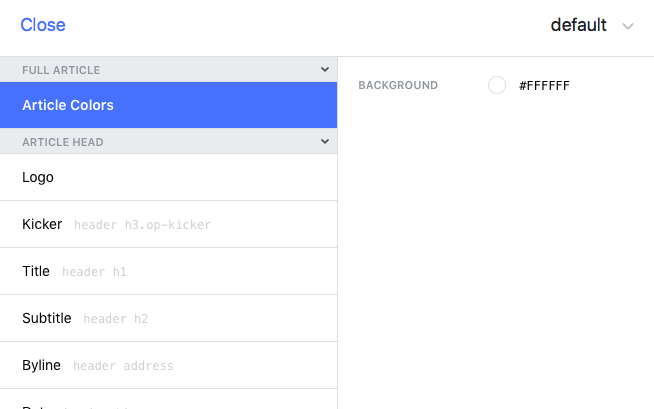
4) Style
Go to Style Tab:
Click on Default:
You will be directed to the Screen which show the layout of your instant article. There, you can edit how should your IA page look like. (Here I just would like to emphasis on adding logo).
Click on the “Logo” , and then add your logo there. Here is the requirement for logo image:
Image Requirements:
- Must be a transparent PNG
- Minimum dimensions: 690px width by 132px height
Then click Save on the Right of the Screen.
After these steps, you have done a lot on Instant article set up.
The next thing you have to do is
1) Create 10 blog posts on your blogspot. (Your blogpost must contain image and text. I would like to suggest to use only one image and article with only a few paragraph)
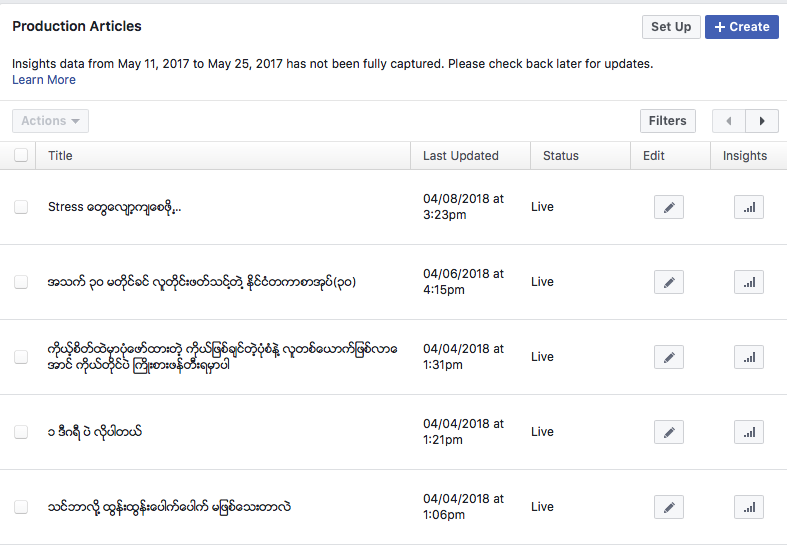
2) Edit some coding in Production Articles.
After you created 10 blog posts, this post will be shown in Production Article column. You have to wait 5 to 30 minutes to see all your 10 blog posts in RSS Feed column.
But at Status Column, your article will be shown as “Unpublished” as you haven’t got Instant article approval.
Click on the “Pencil” icon under Edit Column of first article. (Here you have to edit format of your article to be approved)
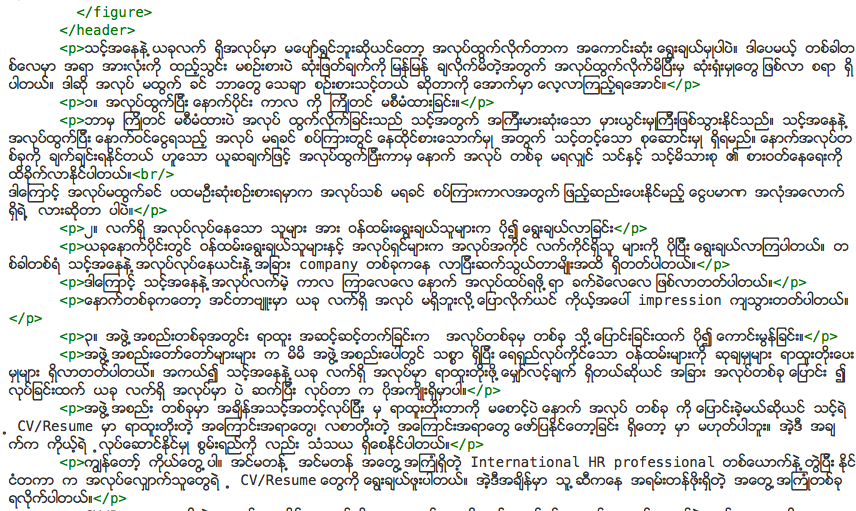
After you click on the pencil icon, you will see some HTML like coding page. Don’t be panic. You just need to add <p> code to the start of your paragraph and </p> at the end of the paragraph. See the image below. You don’t need to add other code, just need to add <p> and </p>.
That’s why I suggested earlier that just use articles with a few paragraph. The more paragraph you have, the more you need to add <p> and </p>.
You have to do all the same for all 10 sample articles you posted on blogspot.
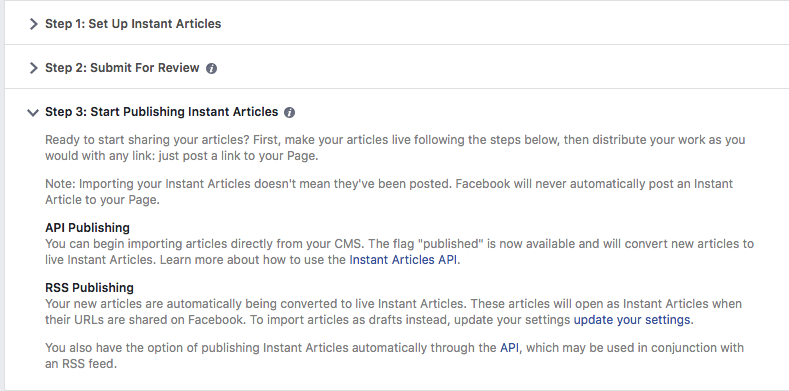
3) Submit Approval
Then go back to configuration in Instant Article Tab,
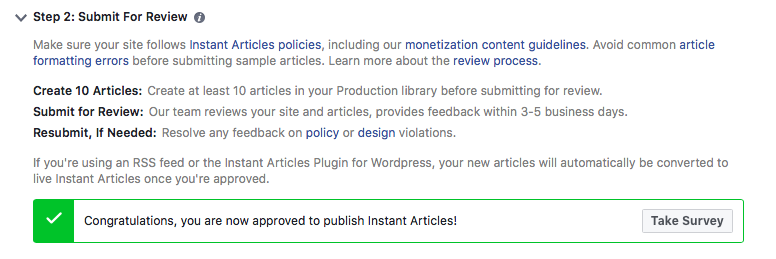
Click on the Step 2: Submit for review
Then click “Submit”
4) Wait 2 to 5 days for reviewing process. Sometimes, it may take longer than 5 days. You may need to edit some format (if you use many photos in the articles or video in the article, that’s why I recommend to use an article with single image and a few paragraph).
5) If you saw the following image in the tab “Submit for review”, congratulation to you that IA is approved for your blogspot.
This is the end of setting up Facebook instant article for Blogger (Blogspot).
In next article, I will write about how to earn money by using Facebook Audience Network.


hi I would like to ask onething.
I did mistakenly remove my url from connect your site. I did unclain url from it. I want to re clain for my url. what should I do ..?Please advise me
Thanks
I think you can reclaim from "Connect your site" again. Did you remove the code from your website HTML? If you removed, you need add add code again.
If you need more assistant: please visit to my page:https://web.facebook.com/nomadicaung/